 Get all your valuable parts collectively. You need to have the ship it self (the hull), the dagger board, the rudder and tiller, your mainsheet, both mast pieces, growth, increase bang and sail in a single location.
Come up with both bits of your mast. The base of the most effective half only slides to the the top of bottom 1 / 2. There are not any hair, or such a thing, it will just fit snugly.
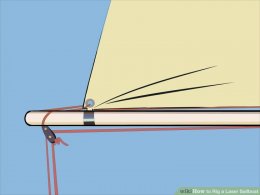
Slide the sail over the mast. There will be a pocket along one side of the sail to slide across mast.
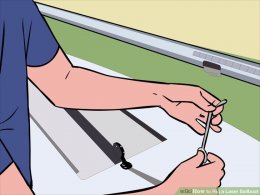
Insert the battens to the sail, they need to slide in and after that you push your end for the batten straight down therefore it will not fallout.
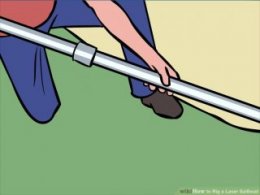
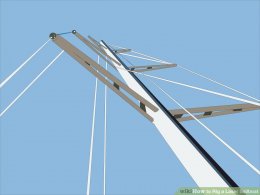
Operate the mast. This is the most difficult part of the whole rigging process, therefore be mindful, no-one likes a broken mast or hull. You operate the mast, make certain it really is correct next to the bow for the laser, and choose it straight up from the surface, and place it in to the mast action (the hole in front of one's laser). A way to get this simpler is always to grab the mast across the middle, then walk forward thereby pushing the sail up. While walking it's also advisable to move your top-hand as much as have much better control of the mast.- The sail should now be flapping in wind.
 get the boom, and place its front end in to the gooseneck (the tiny pin protruding of your mast). Hold it inside, because it will fall off without any other support.
- When you have cleated the outhaul precisely, the growth should today remain on its own.
Connect the clew-tie-down (a little line that wraps round the ring the outhaul is attached with) and cover it across the increase and link it so your clew is really as near the boom as they can be while however to be able to slide forward and backward across the growth.
Connect the increase vang (This piece keeps the growth down if you are sailing). Supposing it's currently rigged it self, you merely need to attach it on bottom of mast, after that slide it in to the little metal clip-on the base of the growth. Now pull down regarding holding range, then pull directly to cleat it.
 10
10
Rig the mainsheet. Simply take one end of it, go directly to the end of the growth, and link it around the attention regarding base of pulley truth be told there. Never place it through the pulley it self; you will require that pulley in a moment. Now that it's tied down, discover other end of your range, and operate it through the traveler regarding the stern of the vessel. Then operate it back up, through the pulley on the become the increase, then forward throughout the base associated with the boom, through that material cycle, through the after that pulley, after which down through primary block in front associated with the seat. Ensure that your primary block clicks when you pull the mainsheet through it - if it doesn't, you must run the mainsheet through other side associated with the primary block. Then link a knot in the extremely end of mainsheet, and so the line can't operate right back through the main block when you are sailing or you capsize.
11
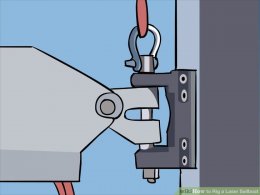
Prior to you add the laser inside liquid, check to make sure the hull connect is screwed into the drain opening inside stern. Then connect the rudder, tiller and daggerboard. Slip the rudder pins in to the eyes from the backside regarding the laser, while making certain that the clip is keeping it down.- Test drive it by pulling up on the rudder. After that apply the tiller by sliding it to the area on the top associated with rudder. When it is in, insert the pin to hold it here.
- Tie the dagger board with a long loop of elastic towards the eye in the extremely front for the motorboat.
- Validate the flexible creates enough friction that the daggerboard will always be up or down (even when you invert the motorboat).
12
Launch. The last thing you have to do, before you start sailing, is tie-down the rudder. There's a little string, found everywhere round the rudder and tiller, you need to pull on to carry along the rudder. When it really is down, tie-off the sequence regarding the cleat that is on the side of your tiller, while're set to sail!
Share this Post
latest posts
-
 Topper Sailing boats July 10, 2024
 -
 Solar Sailboat June 20, 2024
 -
 MIT Sailing Club May 31, 2024
 -
 International Sailing Schools May 11, 2024
 -
 Catalina Sailboats April 21, 2024
 -
 Tighnabruaich Sailing School April 1, 2024
 -
 Sailing Clubs NYC March 24, 2024
 -
 Croton Sailing School March 15, 2024
 -
 Tradewinds Sailing School February 24, 2024
 -
 Glenmore Sailing School February 4, 2024
 -
 Best Sailing Yacht January 15, 2024
 -
 West Beach Sailing Club December 26, 2023